Step 1: Download image viewer cp pro ActiveX setup disk and installed it.
Step 2: Create New Visual Basic Project, select Windows Application.
Step 3: Select Component Tab in Toolbox, Right Click mouse and Select
Add/Remove Items...
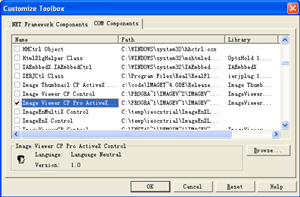
Step 4: In Customize Toolbox, select COM Components Tab, Select Image Viewer
CP Pro ActiveX.
 .
.
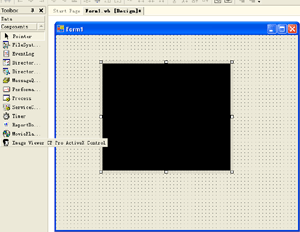
Step 5: Drag the image viewer cp icon into the form.
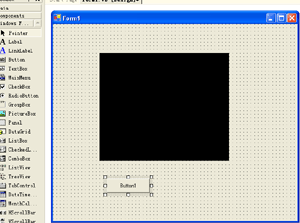
Step 6: Add a buttons into the form.
Step 7: Add following code in buttons click event. You need change the
correct path of your image file in FileName property.
Image Viewer cp pro ActiveX support input JPG, BMP, TIF, PNG, PSD, ICO.
AxImageViewer1.FileName = "c:\yourimage.jpg"
End Sub