1. To install the Video Chat Pro ActiveX Control, begin by launching the setup file (videochatprosetup.exe). Select the desired installation folder for the Video Chat Pro ActiveX and
continue with the installation on Computer A, Computer B and Computer C. You need three computers, one computer for Server. Another computers for Client. Make sure both computers have network connection and installed web cam or sound card.
2. Open our server project in Computer C. If you open our vb.net 2010 or c# 2010 server sample, please compile to exe, then run the WindowFormsApplication1.exe , do not run the project from F5 key.
The window firewall seem blocked the UDP signal, even selected Allow access on firewall setting.
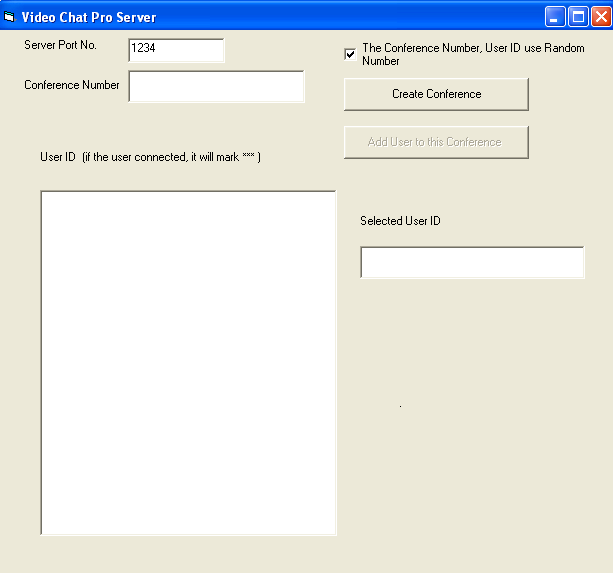
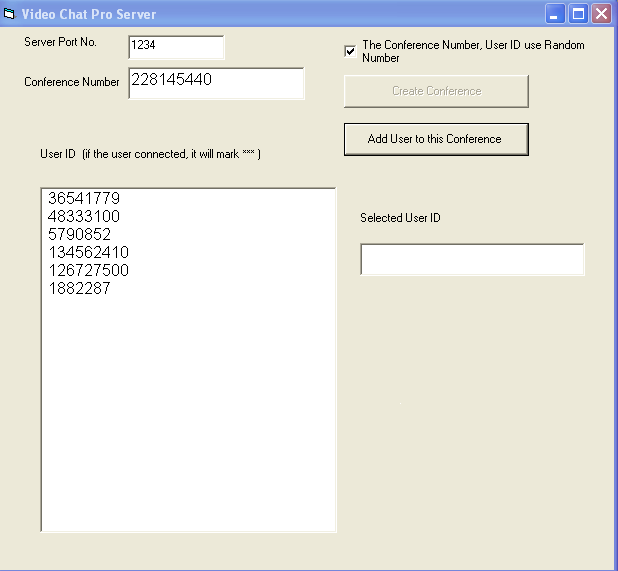
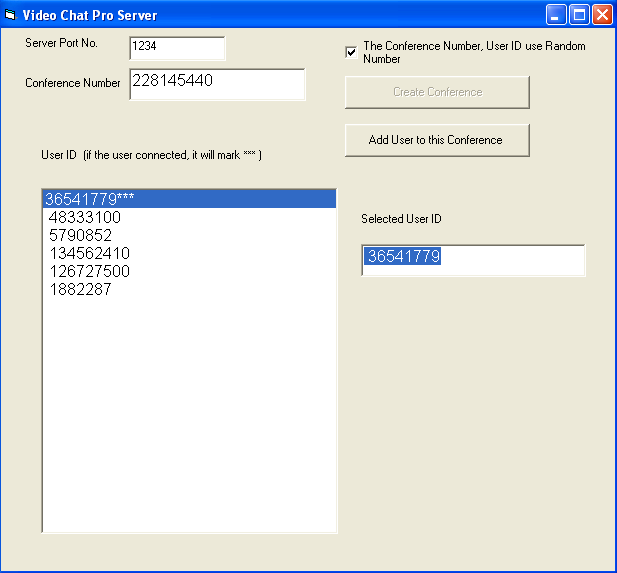
3. Click Create Conference button create Create Conference Room, then click Add user to this Conference button few time. Each Room can create 12 user. Now you see see Conference Number and User ID.
4. Open our client project in Computer A.
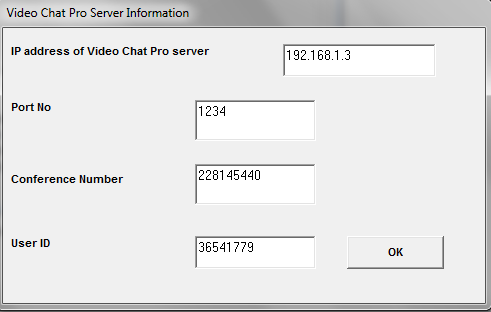
a. Enter the IP address of Video Chat Pro Server (Computer C). e.g 192.168.1.3 , you should enter correct IP address of computer C.
b. Enter the Conference Number, e.g. 228145440 , you will get the Conference Number when you click Create Conference button.
c. Enter the User ID, e.g. 36541779, you will get the User ID when you click Add user to this Conference button,
d. Click OK button.
.
5. Now you enter main screen, you may select Video Device, adjust video format and video bitrate, Click Connect button.
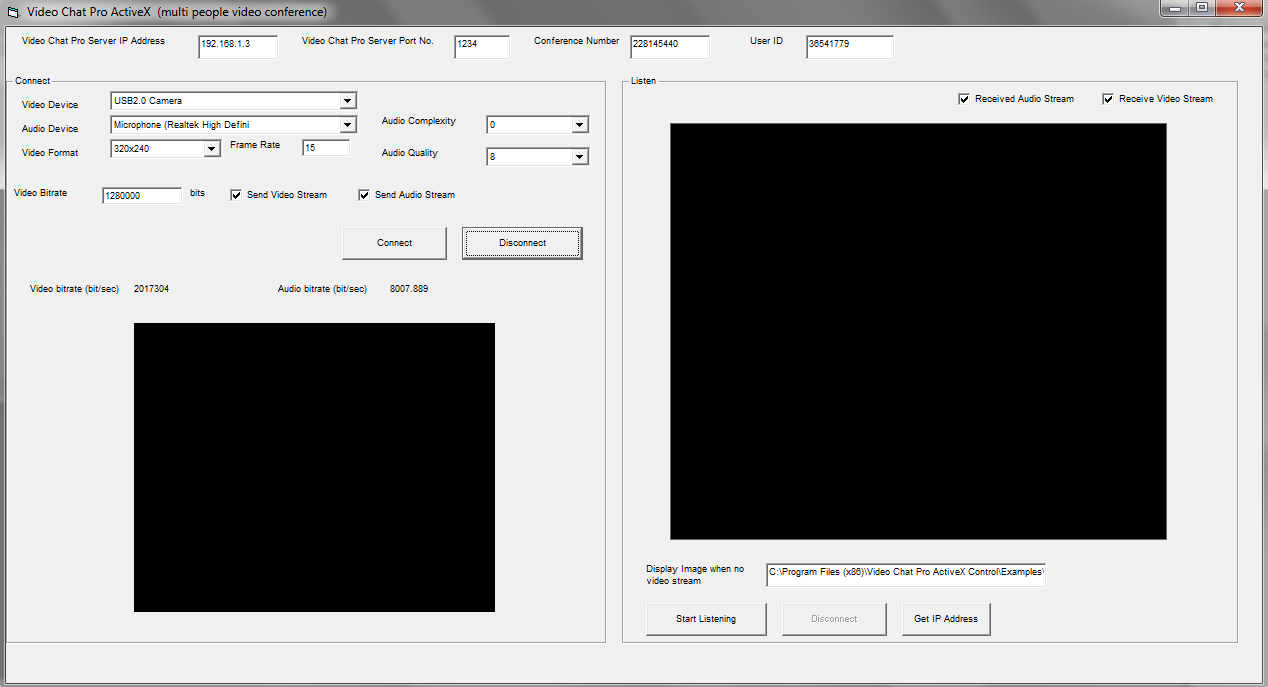
6. If the client connected to server, you will see the user ID mark "***", if you do not see the "***" , you may enter incorrect Conference Number and User ID or your network connection have some problem, it may firewall blocked.
7. Open our client project in Computer B.
a. Enter the IP address of Video Chat Pro Server (Computer C). e.g 192.168.1.3 , you should enter correct IP address of computer C.
b. Enter the Conference Number, e.g. 228145440 , you will get the Conference Number when you click Create Conference Room button.
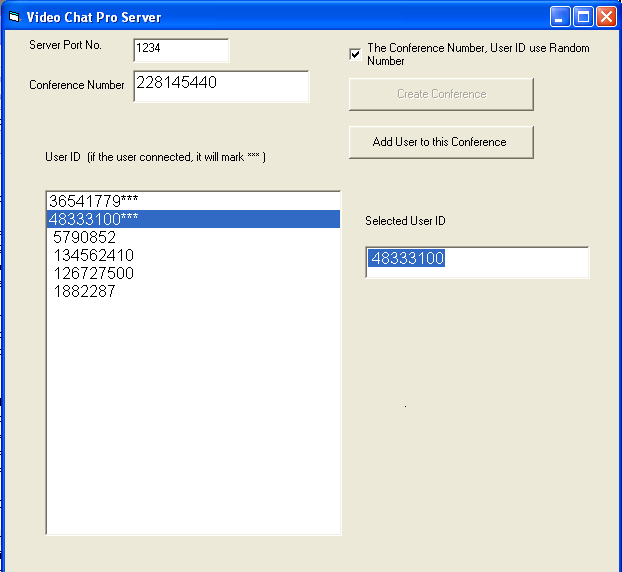
c. Enter the User ID, e.g. 48333100, you will get the User ID when you click Add user to this Conference button,
d. Click OK button and enter Main Screen , then Click Connect button.

8. In server computer, now it have two user connected, you will see two user ID mark "***"
9. In Computer A, click Start Listening Button, you will see the screen of Computer B now. In Listen section, you will see the screen of computer B, If the conference room have a number of people, you will see a lot of video window in Listen section. you can video chat with multi-people in same time, you can hearing more than one people speaking, In some case, you may moving the mouse pointer over specific video window ,right click mouse button, it will mute to specific user. If double click the specific video window, it will zoom in, it will video chat will specific user only , double click again, it will return to normal. 
10. In Computer B, click Start Listening Button, you will see the screen of Computer A now. Now the conference room have 2 people only , You may video chat with 12 people in same time.
|