VB Developer Getting Started
|
VB Developer Getting Started |
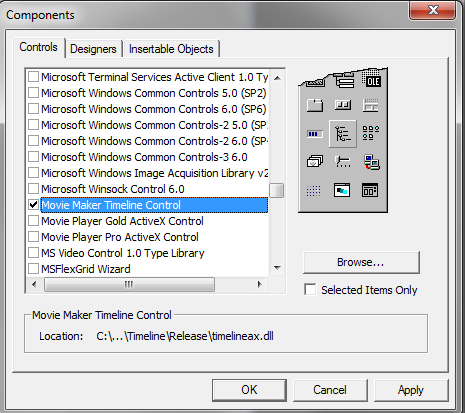
Assuming that you have already run the Movie Maker Timeline Control installation program and started Visual Basic, the next step is to create a project. To do this begin by selecting the "New Project" command from the file menu and select "Standard EXE" as your project type. Then use the "Project/Components.." command to include the file "Movie Maker Timeline Control" into the new project
|
|
Select Control
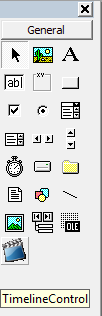
Step 1. Click on the Movie Maker Timeline Control icon and draw it on the form. A Timeline Control should appear on the form, and the Visual Basic Project window form on the right should display Movie Maker Timeline Control's properties.
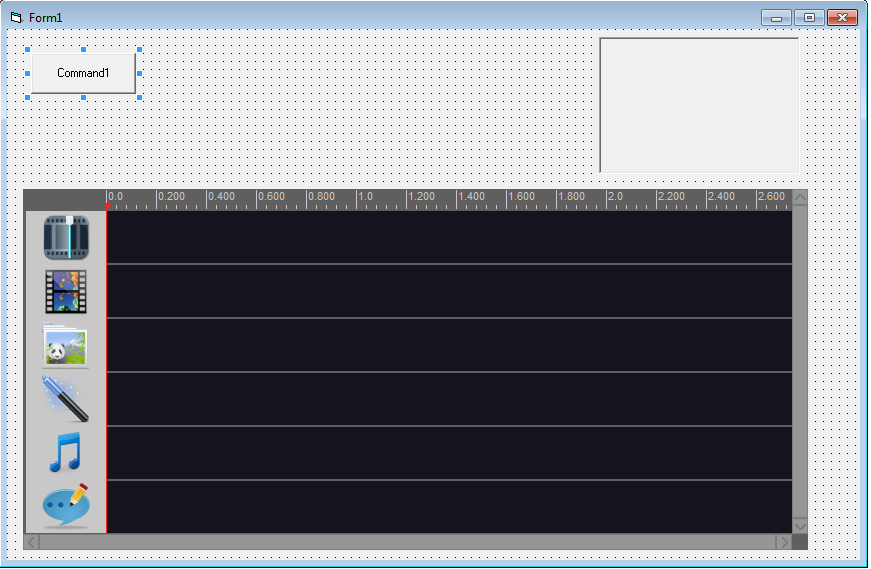
Step 2. Add Command Button and PictureBox in Form with the following code, it will set the preview window on PictureBox.
Private Sub Command1_Click ()
TimelineControl1.SetPreviewWnd Picture1.hWnd
End Sub
Step 3. Next add the following code in Command Button, it will load the video clip and audio clip and preview it.
Dim strVideo1 As String
Dim iVideo1Duration As Single
strVideo1 = "c:\yourfolder\yourfile.mpg"
iVideo1Duration = TimelineControl1.GetMediaDuration(strVideo1)
TimelineControl1.AddVideoClip TimelineControl1.GetVideo1TrackIndex(), strVideo1, 0, iVideo1Duration, 0
TimelineControl1.AddAudioClip TimelineControl1.GetAudio1TrackIndex(), strVideo1, 0, iVideo1Duration, 0, 1
TimelineControl1.Play
Step 4. For VB6 IDE, it does not fully compatible with ATL control, if you run the project on VB IDE, it will crash, but if you select File - Make Project1.exe. then run the Project1.exe in windows explorer.
it will no problem.