1. To install the Video Chat SDK ActiveX Control, begin by launching the setup file (videochatsetup.exe). Select the desired installation folder for the Video Chat SDK ActiveX and
continue with the installation on Computer A and, Computer B if you have two computers. Make sure both computers have network connection and installed web cam or sound card. If you just have one computer only, you may use 127.0.0.1 IP address for testing on local computer.
2. Run our testvideochatsample.exe or sample project in both computers. e.g. Computer 1 and Computer 2.
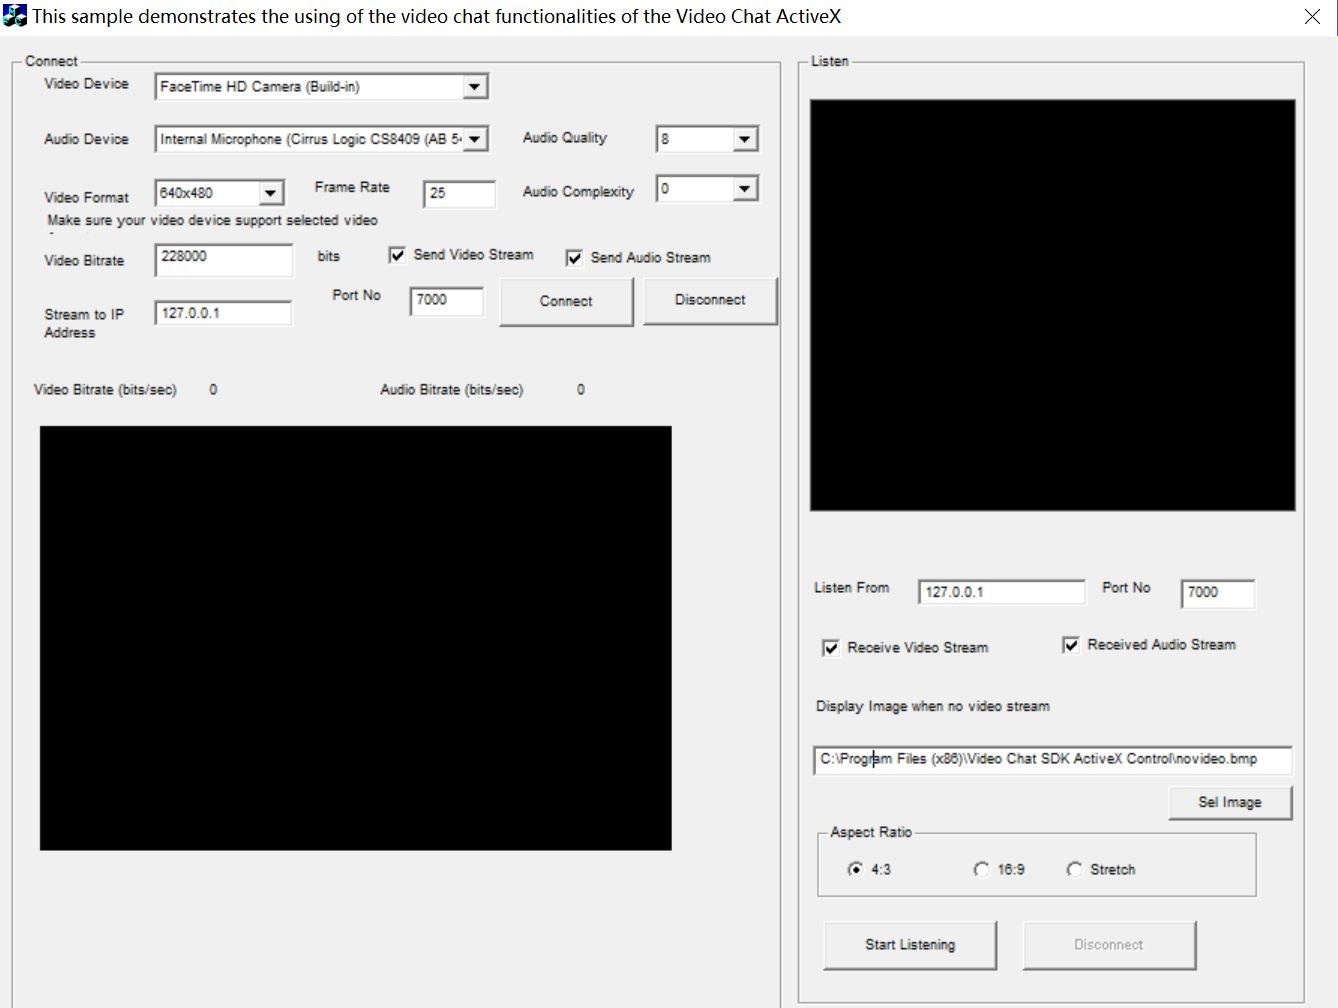
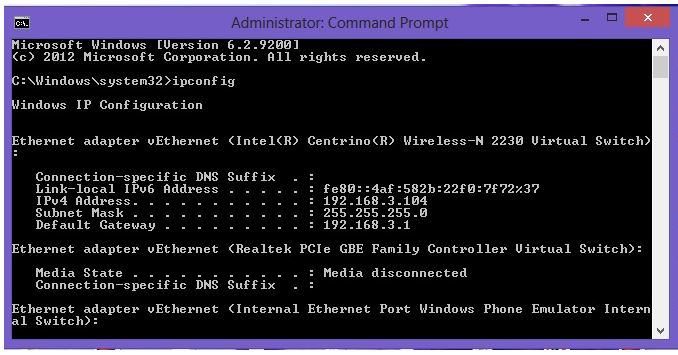
3.Now you need know the IP address of Computer 1 and Computer 2.
In Computer 1, go to Command Prompt, type ipconfig, In this computer, the IP is 192.168.3.104
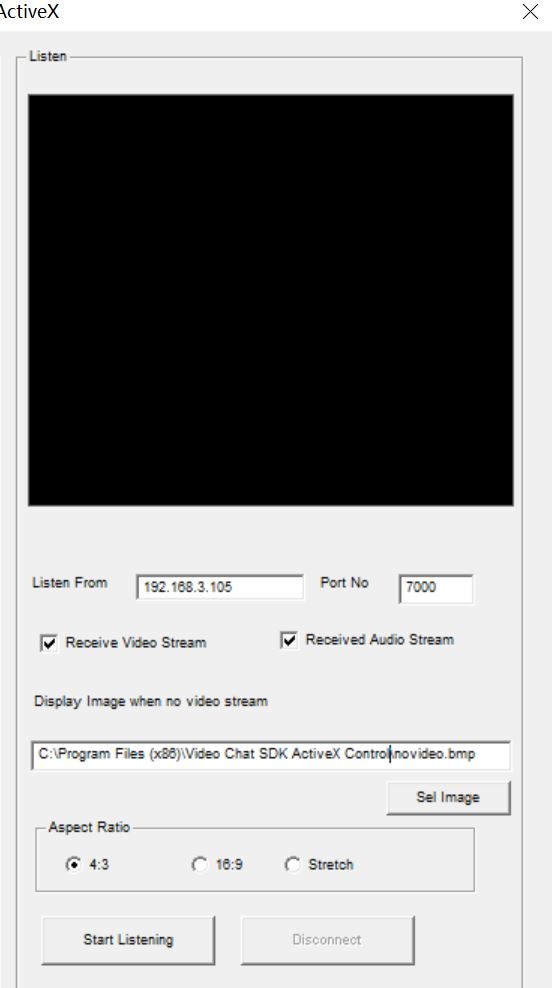
4. In Computer 2, Go to Command Prompt, type ipconfig, for example, the IP is 192.168.3.105
5. In Computer 2, you enter the Computer 2's IP address in the Listen From textbox using Port 7000 and clicked the Start Listening button.
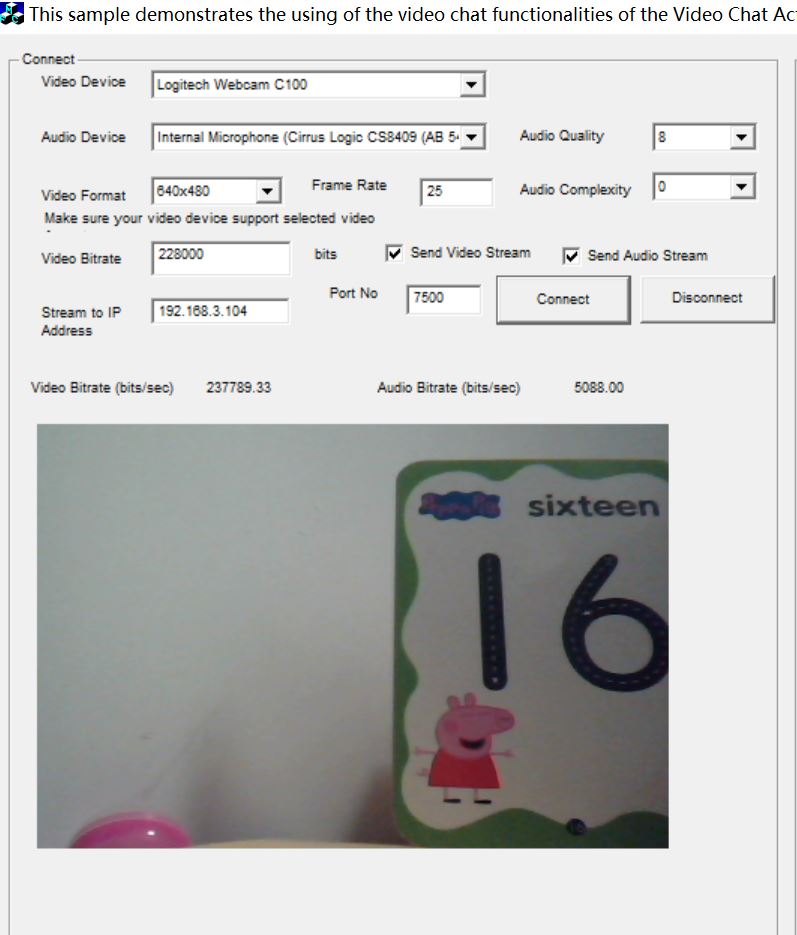
6. On Computer 1, you entered the IP address of Computer 2 in the Stream to IP address textbox along with Port 7000 on the Connect side and clicked the Connect button. If the connection is work. On Computer2, we can see the video from Computer 1 in the Listen side video object.
.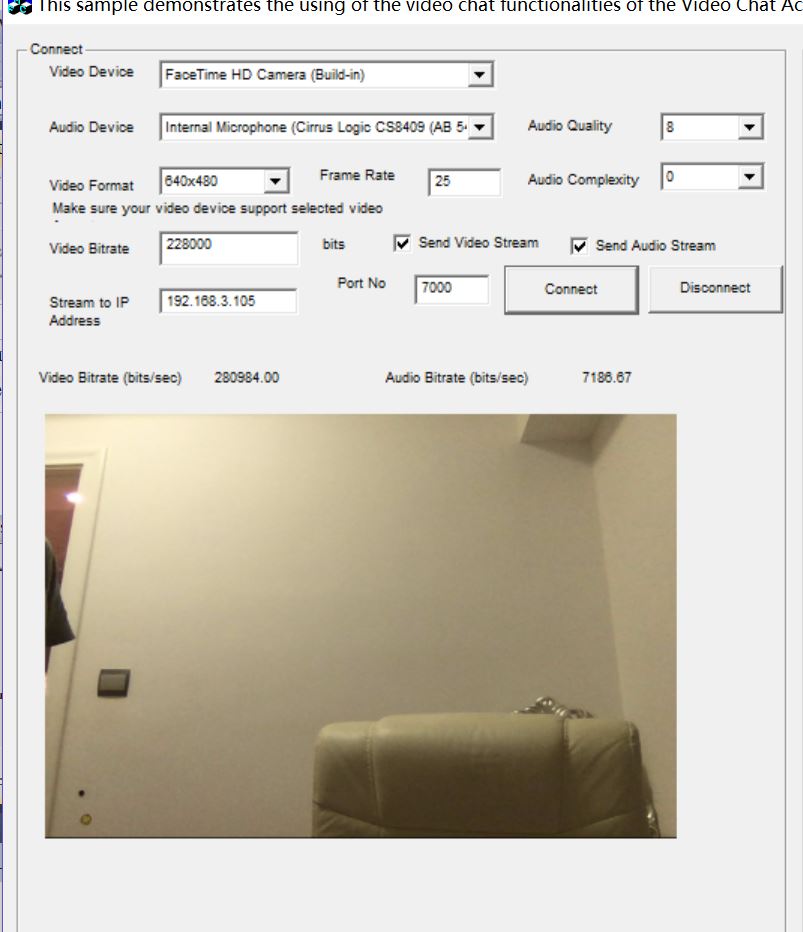
If the Video Bitrate (bits/sec) is 0, try select another Video Format, then click Connect button again. Your video device may support some video format only.
7. On Computer1 you enter the Computer 1's IP address in the Listen From textbox using Port 7500 and clicked the Start Listening button.
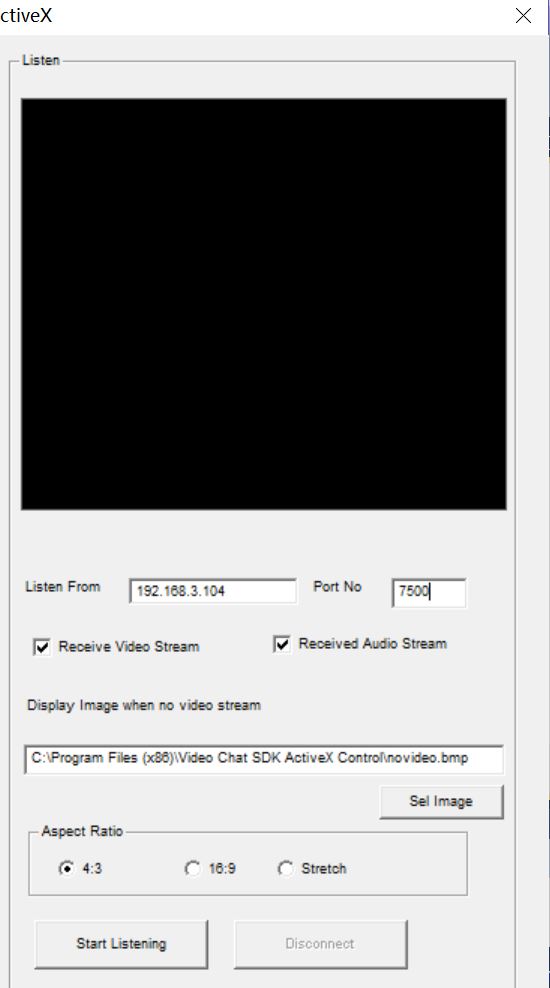
8. On Computer 2, you enter the IP address of Computer 1 in the Stream to IP address textbox along with Port 7500 on the Connect side and clicked the Connect button. On Computer 1, we can see the video from Computer 2 in the Listen side video object.
If your network is low bandwidth, you should use lower video bit rate and video format, otherwise it may affect the connection.
|