ASP.NET 2010 Developer Getting Started
|
ASP.NET 2010 Developer Getting Started |
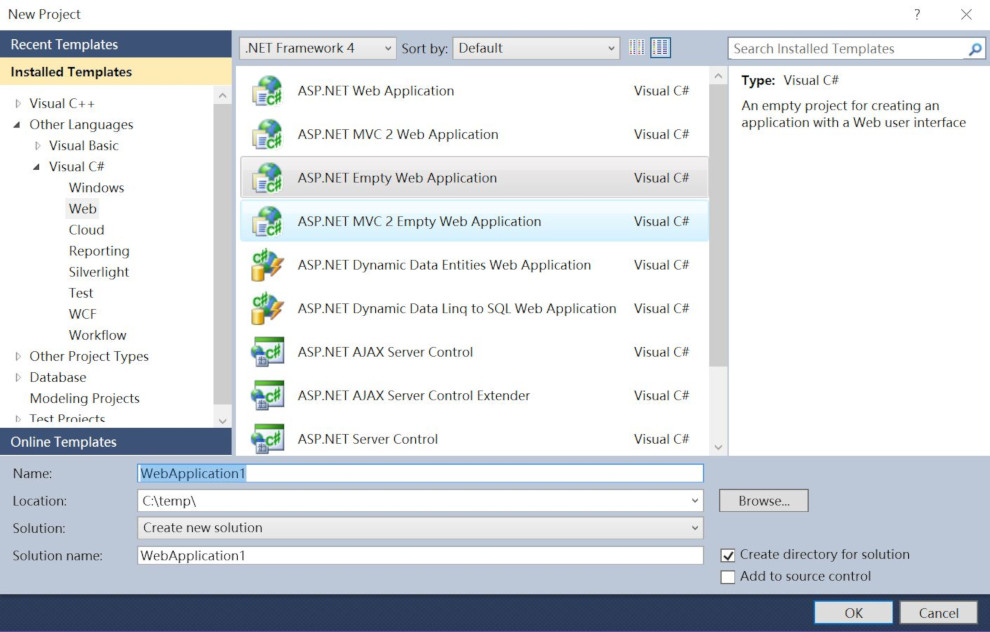
1. Assuming that you have already run the ASP.NET Web Document Viewer SDK Control installation program and started visual studio 2010, the next step is create a new project, select ASP.NET Empty Web Application. Click Next.
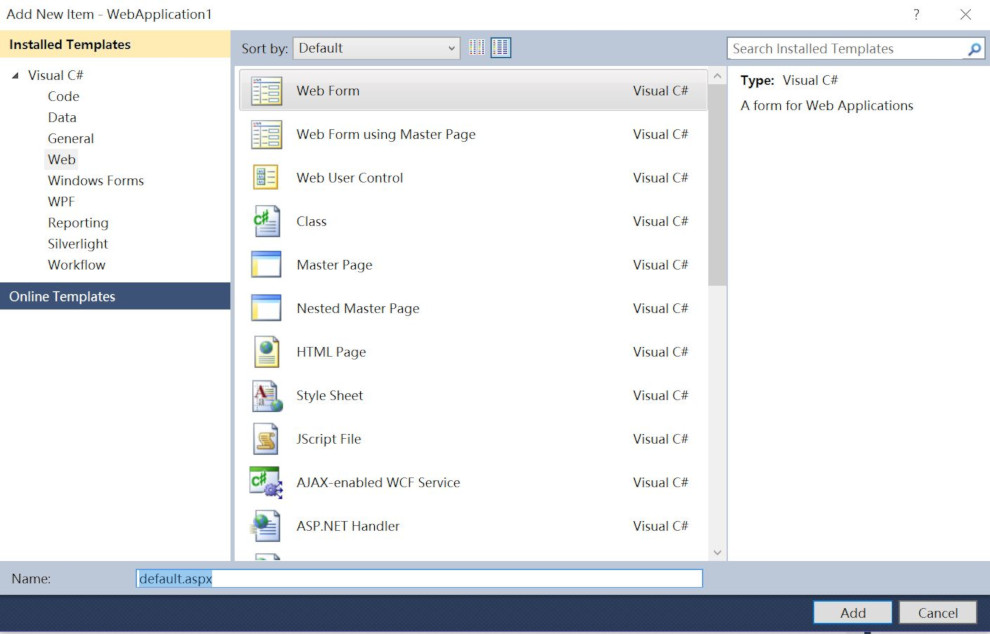
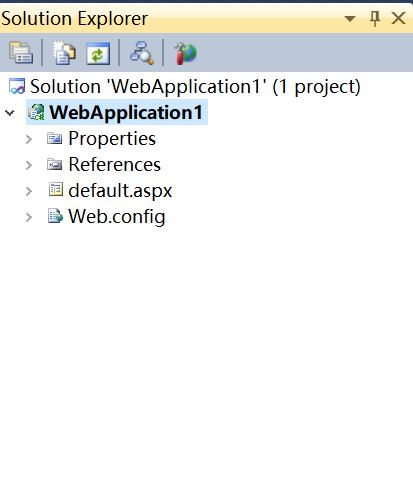
2. Select WebApplication1 in Solution Explorer, right click the mouse, select Add - New Items... , select Web Form, enter the Default.aspx name.
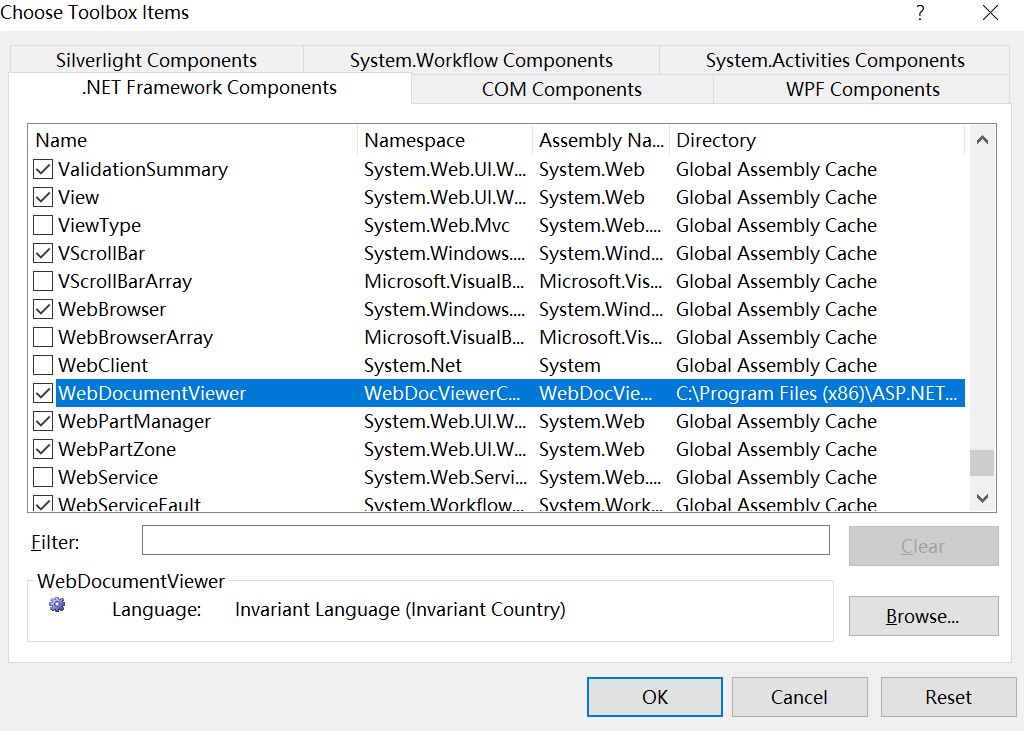
3. In Toolbox, Right click the mouse, select Chooses Items...
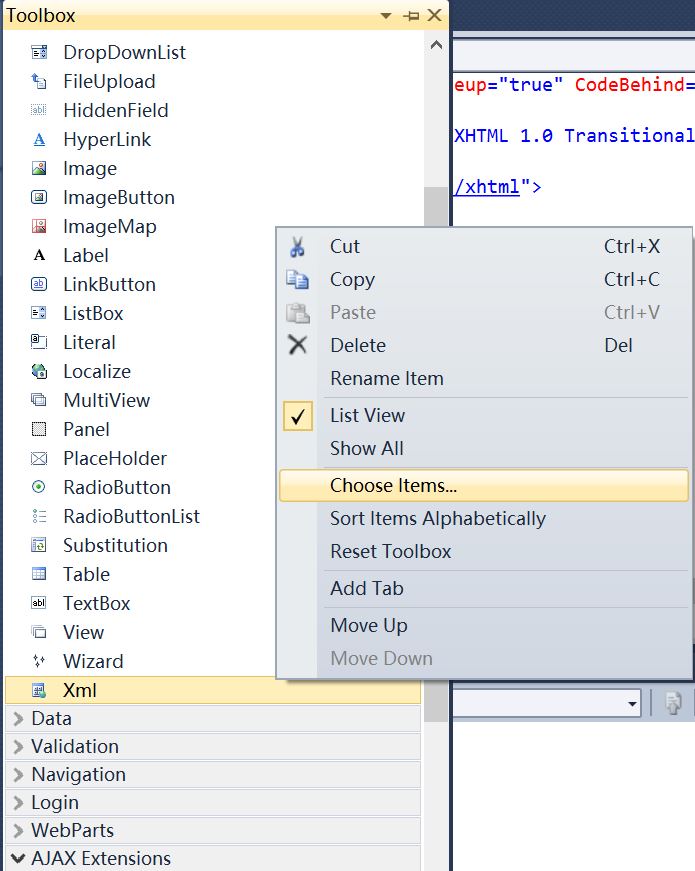
4, Select .NET Framework Components, click Browse... button, select WebDocViewerControl.dll from C:\Program Files (x86)\ASP.NET Web Document Viewer SDK Control\bin folder, then click OK.
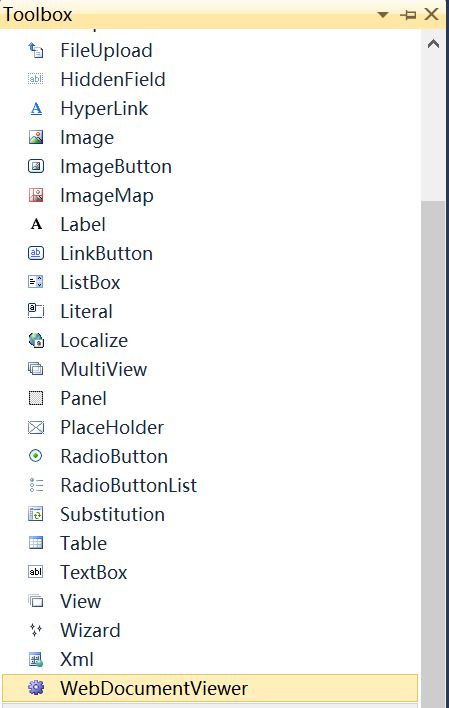
5. In Toolbox, you will see the WebDocumentViewer control icon.
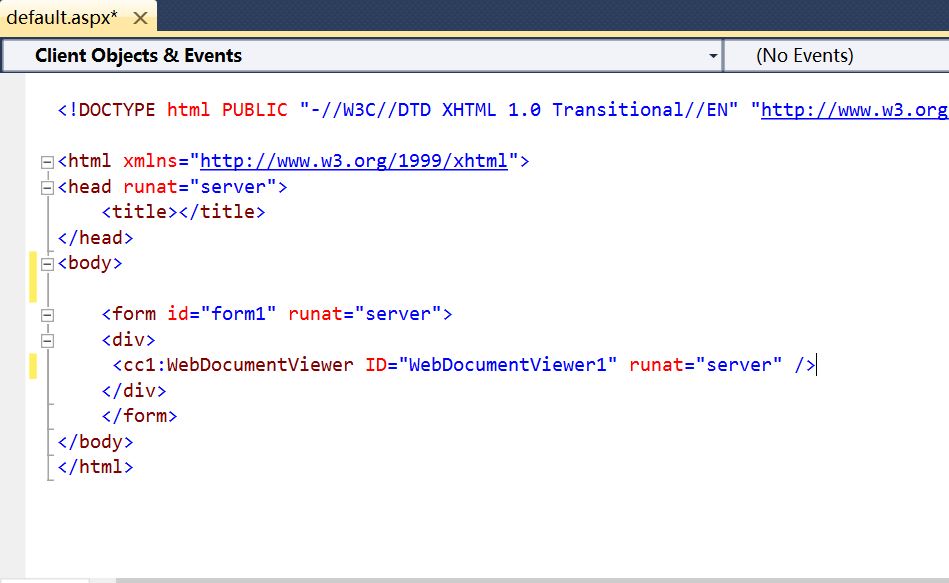
6. Select default.aspx in Solution Explorer, Drag the WebDocumentViewer Control to default.aspx html source code.
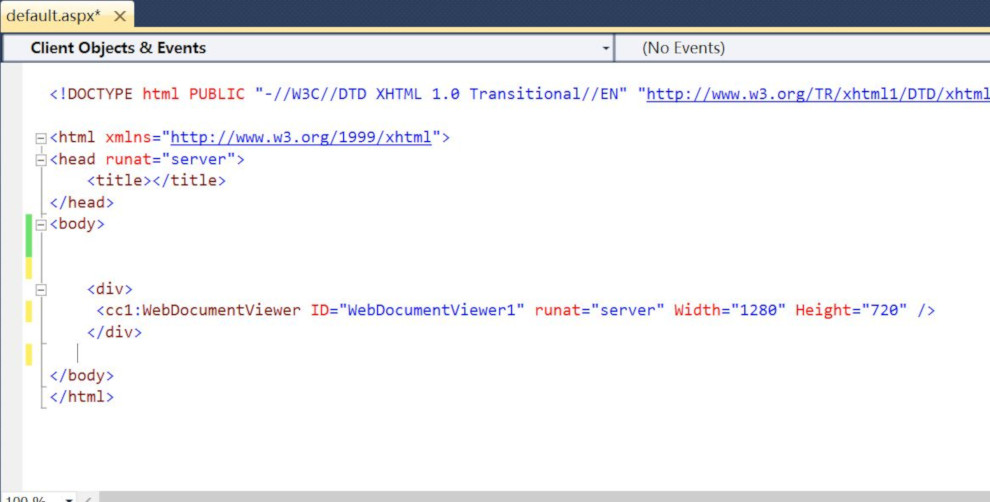
7. We’re also going to use the Width and Height attributes to set the size of the web document viewer, but this is optional and remove form tag.
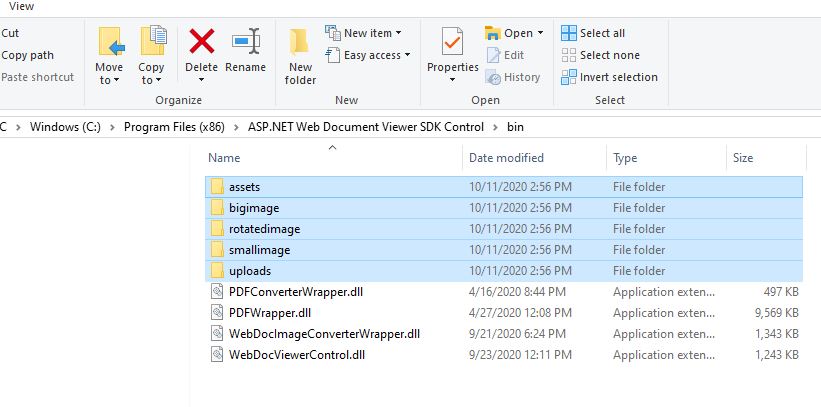
8. Open Windows Explorer, select "assets", "bigimage", "rotatedimage", "smallimage", "uploads" folder, Right click the mouse , select Copy in Context menu.
9.Select WebApplication1 in Solution Explorer, Right Click the mouse, select paste item in Context Menu.
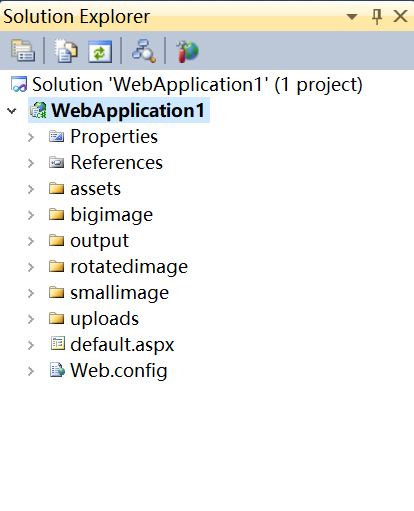
10. After added the folders to WebApplication1 project, you will see the following folders.
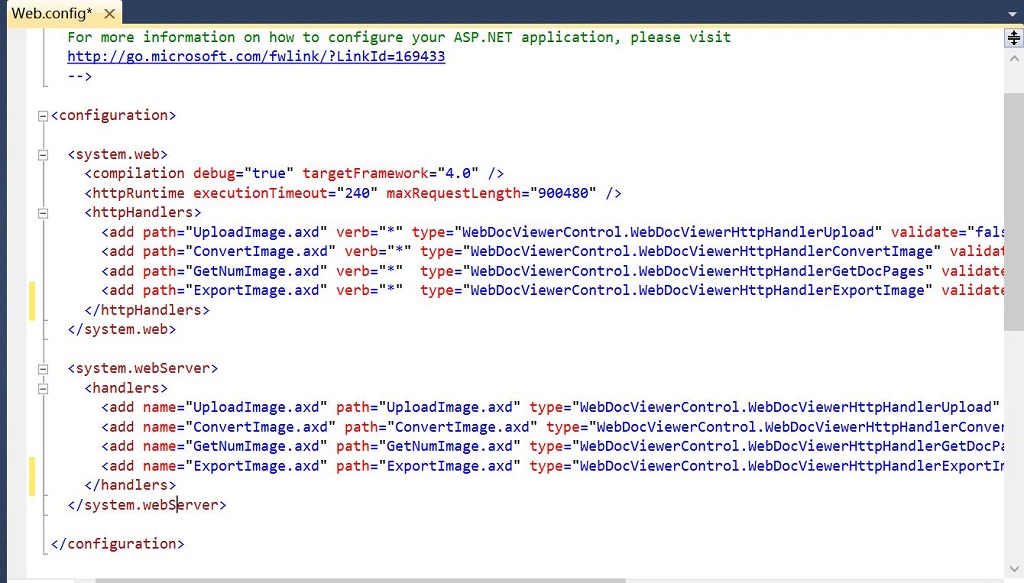
11. Select Web.config, add the following code to Web.config.
<system.web>
<compilation debug="true" targetFramework="4.0" />
<httpRuntime executionTimeout="240" maxRequestLength="900480" />
<httpHandlers>
<add path="UploadImage.axd" verb="*" type="WebDocViewerControl.WebDocViewerHttpHandlerUpload" validate="false"/>
<add path="ConvertImage.axd" verb="*" type="WebDocViewerControl.WebDocViewerHttpHandlerConvertImage" validate="false"/>
<add path="GetNumImage.axd" verb="*" type="WebDocViewerControl.WebDocViewerHttpHandlerGetDocPages" validate="false"/>
<add path="ExportImage.axd" verb="*" type="WebDocViewerControl.WebDocViewerHttpHandlerExportImage" validate="false"/>
</httpHandlers>
</system.web>
<system.webServer>
<handlers>
<add name="UploadImage.axd" path="UploadImage.axd" type="WebDocViewerControl.WebDocViewerHttpHandlerUpload" verb="*" preCondition="integratedMode" />
<add name="ConvertImage.axd" path="ConvertImage.axd" type="WebDocViewerControl.WebDocViewerHttpHandlerConvertImage" verb="*" preCondition="integratedMode"/>
<add name="GetNumImage.axd" path="GetNumImage.axd" type="WebDocViewerControl.WebDocViewerHttpHandlerGetDocPages" verb="*" preCondition="integratedMode"/>
<add name="ExportImage.axd" path="ExportImage.axd" type="WebDocViewerControl.WebDocViewerHttpHandlerExportImage" verb="*" preCondition="integratedMode"/>
</handlers>
</system.webServer>
Here is an example of the web.config
If you do not add <system.webServer> tag in web.config when you run the web application in IIS. It will display "There was error uploading files" error message when you upload the file.
If you need to upload big images, you can specify the maximum file upload size supported by ASP.NET at Web.config, The default size is 4096 KB (4 MB)
e.g. add the following code to Web.config, let you upload 100M file size.
<httpRuntime executionTimeout="240" maxRequestLength="102400" />
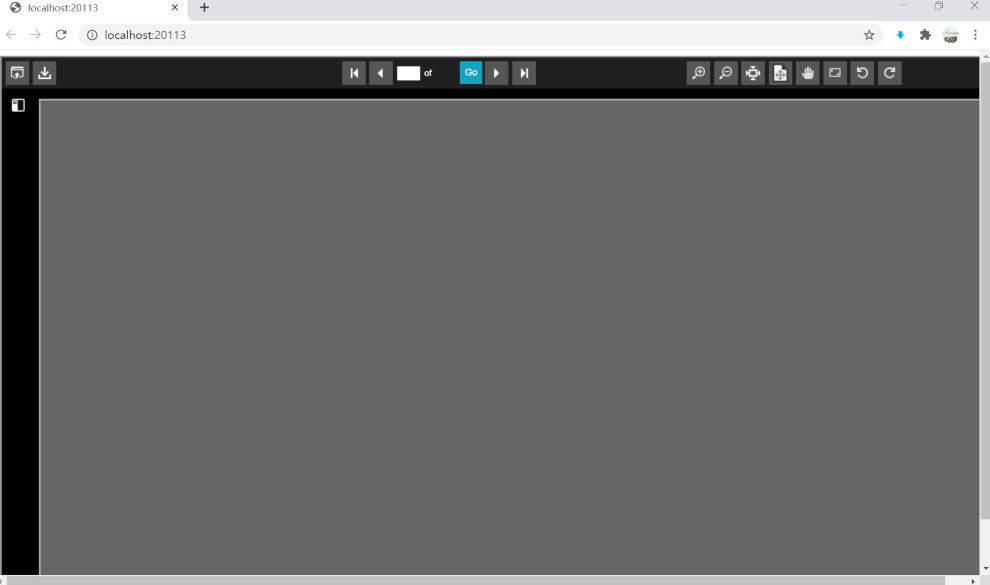
12. press F5 or click the green color arrow icon to run the project.
![]()
13. After run the project, you will see the web document viewer. You can click open button to select the image or TIFF or PDF file.